Adjust color contrast and tone of an image is an important task in adobe photoshop. Color , contrast and tone of the image are an important features of the image. We can improve the quality of the image by adjust color contrast and tone of an image.
Adobe Photoshop is an important software used for image enhancement. We can perform various operations on Image using Adobe Photoshop. In previous photoshop tutorials we have learned about severals experiments on image.
In this tutorial we will see how to fix an image using levels in photoshop cc. Here we will learn about several levels command used for image enhancement.
Students are requested to read this tutorial till the end only then you will be able to adjust color contrast and tone of an image in photoshop cc.
Table of Contents
Frequently Asked Questions
By the end of this tutorial student will be able to answer the following questions or able to adjust color contrast and tone of an image in Photoshop cc.
- How do you contrast colors in photoshop ?
- What is tonal adjustment in photoshop ?
- Where is level adjustment layer in photoshop ?
- How can you adjust the tone and color of an Image ?
- What is Colour Adjustment ?

Let’s start with answer of some basic but important questions.
What is Contrast of an Image ?
We can understand the concept of Contrast by taking two different objects or images. Each image or object has some visual properties. So contrast is something that distinguish one image from other. Contrast of an image can be determined by the differences of color and brightness of an image with other image.
We can also see the contrast in term of difference between maximum and minimum intensity level of the pixel in the image.
What is Tone of an Image ?
In context to image, Tone is associated with color of an image. When we mix a color with gray then tone is produced. Tone is the difference between lightest and darkest portion in an image. In other words we can define tone as range of color lightness and darkness and overall color variation with in an image.
In Photoshop tone can used to represent the mood of the image such as to show the emotions in the image.
What is Auto Contrast in Photoshop?
Auto contrast is a process that makes the lightest pixel of the image to white and darkest pixels of image to pure black. Auto contrast makes the highlighting in image more light and all shadows portion more darker without changing the color values.
What is Tonal Adjustment in Photoshop?
As we explained the meaning of tone in previous question. We adjust the tone using levels command as discussed in the next section of this tutorial.
Where is Level Adjustment Layer in Photoshop?
Level adjustment layer in photoshop is used to adjust the contrast or to control the contrast of an image. In order to find the level adjustment layer option in photoshop at first we click at ” Layer” Menu then select “New Adjustment Layer” button. A drop down list will appears then we select the “Levels” from this drop down list.
Adjust Color Contrast and Tone of an Image ?
Before editing any image in the Photoshop software, we need to adjust the contrast, colour and tone of the image to enhance the look of the image. The photoshop software has an amazing tool called Levels command which helps in adjusting these properties of an image easily.
It makes the adjustment in colour and tonal contrast of an image very simple and much easy. In this tutorial, we are going to learn how to adjust the contrast, colour and tone of an image. In order to do so, you just have to follow the given steps
Step 1. First of all, you will need to properly set the Levels command in Photoshop. For this purpose, click on the image tab which is present in the menu bar. Then click on the adjustment option and select the Levels option from the list. After clicking on the Levels option, a levels dialog box will appear on your screen.
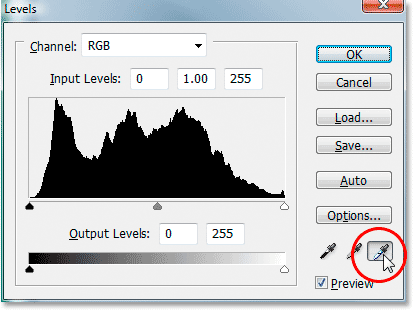
Step 2. Now a new interface will appear on your screen known as Layers interface. In this box, you will see three eye dropper icons that will appear on the bottom right part of the interface. The right – most eye dropper is known as the white point eye dropper. This eyedropper tool helps in maintaining the details in the lightest parts in the image. It also prevents the lighter part of the images from becoming completely white. This is dhown in following figure.
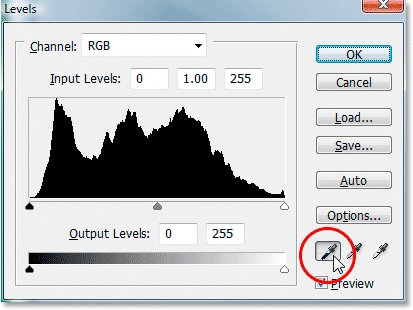
Whereas the eye dropper which is the left most in the series is known as the black point eyedropper. This eye dropper helps the user in maintaining detail of the darkest parts or shadows in the image. It prevents the darker parts of the images from becoming completely black. Symbol for black eyedropper is as shown in following figure.
Step 3. When you will click on any of the eye dropper available in the interface, an RGB color- picker will open where you will have to specify the desired value of RGB colours to make appropriate changes to your image. To close the RGB color picker, just click on the OK button that is available in the top right part of the color- picker.
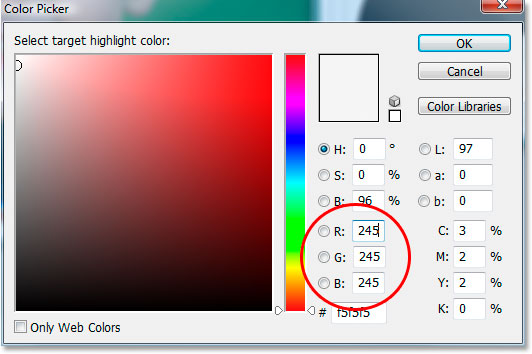
For white point eye dropper, firstly you will need to set the white point value to 245 in each one that is ‘R’, ‘G’ and ‘B’, The default white point value is 255 for each of the three. This data is shown in following figure.
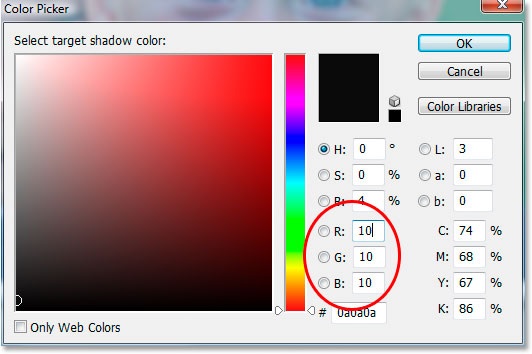
- For black point eye dropper, first of all you must set the black point value to 10 for each of the ‘R’ , ‘G’ and ‘B’ boxes. The default black point value is 10 for each of them. This is hown in the figure given below.
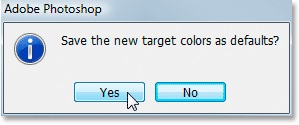
Step 4. When you will exit the color- picker, the photoshop software will you ask whether you want to save the values that you have entered in the color picker or not. If you click on the Yes button, you will not need to enter the values ever again in the color- picker for the same purpose.
Conclusion and Summary
Ih this tutorial at first we have discussed answer of some important questions in context to image then we have discussed the step wise step process used to adjust color contrast and tone of an image. I hope that process will be cleared to every student and student will able to perform this task in photoshop.
If you have any query or problem then you may ask. I will try to answer your queries.
Your feedback is really valuable for us.Please give your feedback or leave comment so that we can improve the quality of our tutorials and provide tutorials as per your expectation.
If you want to add or contribute some more information to this tutorial then mai us at the email id computersciencejunction@gmail.com
Don’t stop learning and practice.
If you find this page useful then please Like and Share the post on Facebook, Twitter, Linkedin through their icons as given below.


